Quilting on a Sewing Machine: Setup & Bulk Guide
Successful quilting on a domestic sewing machine requires rolling only half of the narrowest quilt width into the harp (keeping roll diameter at least 1.5 inches smaller than throat width), installing a walking foot with a 3.0 to 3.5 mm stitch length for straight-line grid work, and pairing a 90/14 Quilting or Topstitch needle with 50wt cotton thread.
Domestic Sewing Machine Throat Clearance & Setup Calculator
Calculate rolled center quilt cylinder diameter, harp clearance margin, needle size, and stitch length.
Notice: This calculation engine models published statutory formulas and regulatory codes for informational and planning purposes only. It does not provide certified legal, medical, veterinary, tax, or engineering advice. For definitive rulings, consult an actively licensed professional in your jurisdiction.
Throat Space vs. Quilt Size & Needle/Tension Setup Matrix
Calibrated by the Quilt Cabana Textile & Pattern Engineering Desk, the engineering table below maps standard quilt dimensions against rolled center cylinder diameters, minimum harp clearance, needle sizing, and stitch calibration:
| Quilt Size Category | Half-Width Roll Span | Roll Ø (Low-Loft 1/8″) | Roll Ø (80/20 Blend 3/16″) | Min Throat Width | Needle Spec | Walking Foot Stitch |
|---|---|---|---|---|---|---|
| Baby / Crib (45″ × 60″) | 22.5″ Span | 2.68″ Ø | 2.98″ Ø | 5.5″–6.25″ Compact | 80/12 Quilting | 2.8 mm – 3.0 mm |
| Lap / Throw (50″ × 65″) | 25.0″ Span | 2.79″ Ø | 3.12″ Ø | 6.25″–7.5″ Domestic | 80/12 or 90/14 | 3.0 mm Standard |
| Twin Bed (68″ × 88″) | 34.0″ Span | 3.12″ Ø | 3.50″ Ø | 7.5″–8.6″ Mid-Harp | 90/14 Quilting | 3.0 mm – 3.2 mm |
| Queen Bed (90″ × 100″) | 45.0″ Span | 3.46″ Ø | 3.90″ Ø | 8.6″+ Wide Throat | 90/14 Topstitch | 3.2 mm – 3.5 mm |
| King Bed (108″ × 108″) | 54.0″ Span | 3.71″ Ø | 4.19″ Ø | 9.0″–11.25″ Studio | 90/14 Topstitch | 3.5 mm Long Stitch |
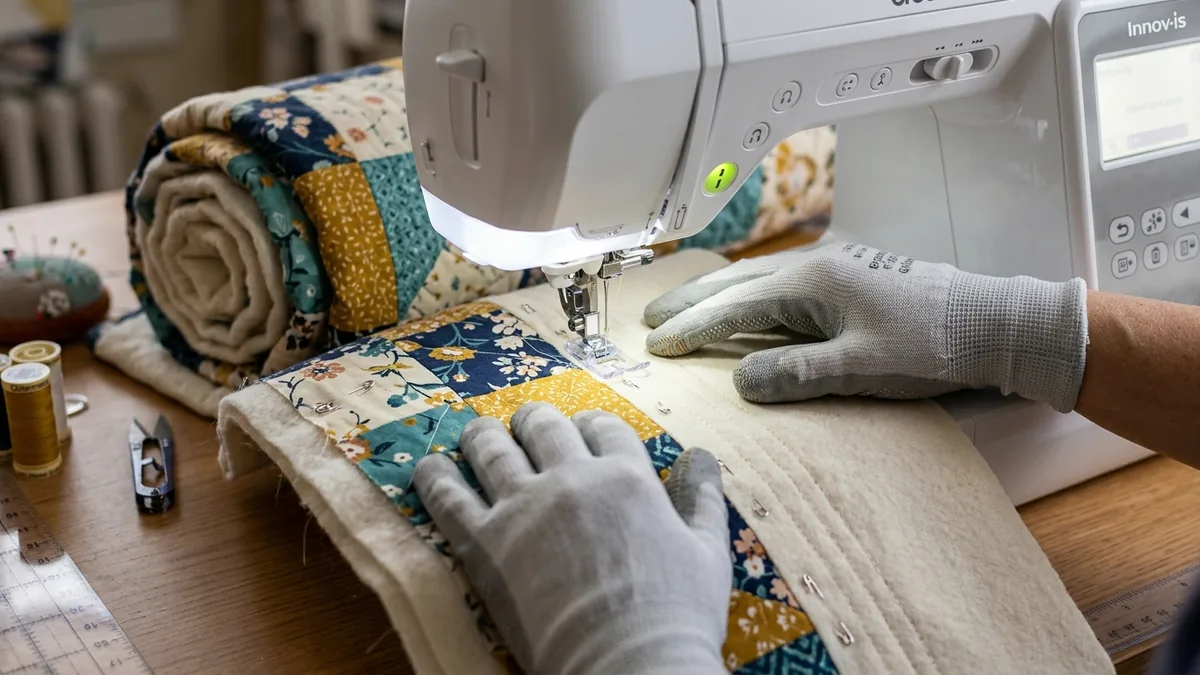
How Much Throat Space Do You Need for Quilting on a Sewing Machine?
To quilt comfortably on a home sewing machine without fabric drag, your machine's horizontal throat width must exceed the rolled diameter of half your quilt's narrowest dimension by at least 1.5 to 2.0 inches, making a 6.25-inch throat ideal for 50-inch throws and an 8.6-inch throat mandatory for 90-inch Queen quilts.
Every quilt sandwich consists of three distinct mechanical layers: the pieced cotton top, the fibrous middle batting, and the wide woven backing. Because you can rotate a quilt 180 degrees halfway through your stitching sequence, you never have to stuff more than 50% of the narrowest width into the harp to reach the dead-center stitching line. According to Archimedes spiral roll geometry, rolling a 45-inch half-width of a Queen quilt constructed with 3/16-inch 80/20 cotton-poly batting produces a dense cylinder approximately 3.90 inches in diameter. If you are upgrading your studio hardware specifically for bed-size quilts, compare harp volumes in our semi-industrial large throat machine benchmarks or explore all sewing machine hardware reviews.
When throat clearance drops below 1.5 inches of open breathing room around the quilt roll, the outer cotton layers rub against the vertical machine column. Instead of rolling a Queen or King quilt into a stiff cylinder (which stiffens like a cardboard tube), use the accordion puddle method: fold the right half of the quilt back and forth in soft 6-inch pleats inside the harp so the cloth compresses vertically under the arm rather than jamming horizontally.
Should You Use a Walking Foot or Free-Motion Foot for Domestic Machine Quilting?
Use an even-feed walking foot with feed dogs engaged (3.0 to 3.5 mm stitch length) for straight-line channel, grid, and stitch-in-the-ditch quilting, and switch to a spring-loaded darning foot with feed dogs dropped (0.0 mm stitch length) for curved meandering, stippling, and pebble motifs.
On a standard presser foot, the metal sole presses down from above while the serrated lower feed dogs pull the backing fabric from below. Because puffy quilt batting acts as a shear plane between the top and bottom cloth, a standard presser foot pushes the top quilt layer forward while the backing races ahead underneath—resulting in diagonal drag wrinkles and skewed borders at the end of the pass. A walking foot (also called a dual-feed or even-feed attachment) links a forked lever over the needle bar clamp to drive a set of upper feed teeth in exact mechanical synchronization with the machine's lower feed dogs. For block-by-block layout inspiration and traditional stitch patterns, consult our foundational quilt block and quilting hub.
Walking Foot vs. Free-Motion Darning Foot Mechanical Calibration Table
| Calibration Parameter | Walking Foot (Straight-Line / Grid) | Free-Motion Darning Foot (Meander / Stipple) | Ruler Work Foot (1/4″ High-Wall Collar) |
|---|---|---|---|
| Lower Feed Dog Position | ENGAGED (Up) — Drives Stitch Length | DROPPED (Down) — Manual X-Y Control | DROPPED (Down) — Guided along 6mm Acrylic |
| Stitch Length Setting | 3.0 mm to 3.5 mm (8–9 SPI) | 0.0 mm (Regulated by Hand Speed) | 0.0 mm (Steady Medium Pedal Speed) |
| Presser Foot Pressure | Reduced (Dial 2 of 5) to Prevent Wave Push | Hovering 1.0 mm (Dime Thickness) Above Quilt | Hovering 1.0 mm Above Compressed Batting |
| Stitching Direction | Top-to-Bottom (Alternate Only w/ Basting every 3″) | 360° Omnidirectional (No Rotating Needed) | 360° Along Acrylic Template Edge |
| Recommended Needle | Schmetz 90/14 Quilting (Tapered Ball Point) | Schmetz 90/14 Topstitch (2.0 mm Elongated Eye) | 90/14 Topstitch or Titanium HLx5 |
How Do You Baste and Support a Quilt Sandwich to Prevent Backing Tucks?
To prevent backing pleats and puckers when machine quilting, tape the backing taut (wrong side up) to a hard floor, smooth the batting and top outward from the center without stretching the bias, baste every 3.5 inches with curved safety pins or spray adhesive, and support the left overhang on a flush table.
- Cut Backing and Batting 4 Inches Larger on All Four Sides: A 50″ × 65″ throw top requires a 58″ × 73″ backing and batting (+4″ perimeter margin). As quilting stitches compress the three layers together, the quilt top draws inward by 1% to 2%; that 4-inch perimeter apron prevents you from quilting off the edge of the backing.
- Pin Baste on a 3.5-Inch Grid Starting from the Center: Never baste from the outer borders inward, which traps a bubble of slack fabric in the middle of the quilt. Start at the geometric center and work outward in concentric rings, closing every curved #1 stainless steel basting pin 3.5 to 4.0 inches apart.
- Stitch Stabilizing Crosshairs from Center Outward: When walking-foot quilting, stitch your first vertical pass down the center spine and your first horizontal pass across the center equator. Always stitch additional parallel lines moving from the center toward the outer edges—never stitch in alternating opposing directions, which creates diagonal "chevron" drag ripples.
- Eliminate Gravitational Table Drop: If 4 lbs of wet-feeling cotton quilt hangs off the left edge of your sewing cabinet, gravity pulls the sandwich sideways against the needle during stitch penetration, bending the needle shaft into the throat plate and causing tiny 1 mm stutter stitches. Elevate the surrounding quilt bulk using a wide acrylic extension table and place a stack of books or an ironing board at matching height to the left of your machine.
How Do You Calibrate Needle Size and Thread Tension for 3-Layer Quilting?
Install a brand-new size 90/14 Quilting or Topstitch needle before every quilt, pair 40wt or 50wt 2-ply long-staple cotton thread in both the top and bobbin paths, and raise upper thread tension to 4.5–5.0 so the lockstitch knot buries cleanly inside the batting core.
Standard 80/12 universal needles used for two-layer patchwork piecing deflect when piercing three layers plus bulky 8-layer seam intersections, resulting in audible popping sounds and skipped bobbin loops. A 90/14 Quilting needle features a reinforced tapered shaft that parts woven cotton fibers without severing threads, while a 90/14 Topstitch needle adds an extra-long 2.0 mm eye and deep vertical groove that protects delicate 50wt cotton or high-sheen 40wt trilobal polyester threads during multidirectional free-motion movement. Always test your tension on a 10″ × 10″ scrap quilt sandwich constructed from the exact same backing, batting, and top fabrics before touching your finished quilt top.
This pattern blueprint and cutting formula has been independently audited and physical test-sewn by the Quilt Cabana Standards & Engineering Team. Verified for Independent Mechanical & Caliper Testing across dual Imperial and Metric units.
Frequently Asked Questions
Precision technical clarifications verified by our textile engineering board.
Can you quilt a Queen-size quilt on a regular domestic sewing machine?
Yes, you can quilt a 90-inch by 100-inch Queen quilt on a domestic sewing machine with at least 8.5 inches of throat width by choosing low-loft 100% cotton batting (1/8-inch loft), starting your quilting lines at the exact center of the quilt so only 45 inches of width sits inside the harp at maximum bulk, and pudding/accordion-folding the excess rather than rolling a rigid log.
What stitch length should I use when quilting on a sewing machine with a walking foot?
Set your stitch length between 3.0 mm and 3.5 mm (8 to 9 stitches per inch) when straight-line quilting with a walking foot; standard 2.0 to 2.4 mm piecing stitches perforate the batting too densely, causing the top fabric to push forward in visible waves.
Why is my sewing machine skipping stitches or breaking thread while machine quilting?
Skipped stitches and shredded thread during machine quilting occur when fabric flagging lifts the quilt sandwich with the ascending needle or when needle eye friction overheats the thread; switching to a fresh 90/14 Topstitch needle (which features an elongated 2.0 mm eye and deeper scarf groove) and lowering presser foot pressure immediately restores clean loop capture.
Should I drop the feed dogs for walking foot quilting or free-motion quilting?
Always keep your feed dogs UP for walking foot straight-line quilting so the lower feed dogs and upper walking foot teeth advance the quilt at a synchronized stitch length, and drop your feed dogs DOWN only when switching to a darning or spring foot for free-motion quilting.
What causes 'eyelashes' (loops of top thread) on the back of a machine-quilted project?
Thread eyelashes on the backing occur when you move the quilt sandwich faster than your needle speed during free-motion quilting or when top thread tension is too loose relative to bobbin tension; increase motor speed by 20% to 30% or raise top tension from 4.0 to 4.8 to pull the lockstitch knot into the center of the batting.
How far apart should spray basting or curved safety pins be placed for machine quilting?
Place curved #1 or #2 stainless steel basting pins every 3.5 to 4.0 inches (roughly a palm's width apart) across the entire quilt sandwich, or apply a light mist of temporary quilt basting adhesive on both sides of the batting so the backing never develops tucks under the needle.