If you’ve been following this blog over the last few weeks, you know I’ve been searching for a method of applique that I can live with! Fusible aside, I’m looking for a good technique for making prepared appliques that are turned under and then basted to the background – so not needle turn. My heart will always belong to fusible but I’m ready to branch out and learn something new.
I’ve tried a few methods now and the first one was with the back-basting method from the book pictured here alongside some other items:
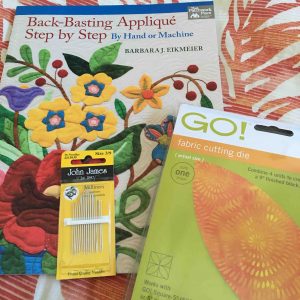
I decided I didn’t care for this technique for one main reason. The basting is done on the back side which means you have to sort of keep peeking at the front and hoping that you covered the required amount of space with your fabric. It’s also needle turn. The template is traced onto the back side and you stitch around that catching the fabric on the top. The idea was good but the practice was a bit hard. So, it’s out for now.
The second was with freezer paper templates in the style of Jill Finley of Jillily Studio
I love her! She’s very funny and makes it look really easy. Jill recommends layering four pieces of freezer paper together when you make the templates. Starch and an iron are used to turn the fabric over the templates. Roxanne’s Glue Baste It is used to adhere the applique piece to the background. It’s not a bad method but the starch gets the template a bit soggy. The iron gets very hot and even with a tailor’s awl, it’s hard to maneuver the pieces for a smooth edge.
Karen Kay Buckley has a similar method but she uses sizing instead of starch and her templates are made of hard plastic. “Perfect” is her catch phrase and let’s face it, that’s a lot of pressure right there. I do like her thread bag which holds a lot of thread and you don’t even have to take it out to use it. You can thread it right through a strip of micro suede that is on the bag. I have to get one of these! They are $35 for the bag but if you want it full of thread, it can be yours for the low price of $190! LOL!
The next method I investigated was Jeanne Sullivan’s from this book:

Her method is two layers of freezer paper and the iron and starch routine. I have begun this project from the book…
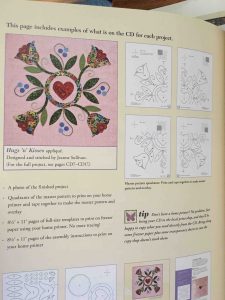
I like her patterns and how thorough the instructions are but I’m not loving freezer paper.
Next up was the uber popular Apliquick Method from Rosa Rojas. I learned about this method and the tools from The Quilt Show. Rosa and her business partner live in Spain and they have come up with a great method that does not use freezer paper or starch. Instead a water soluble applique paper is used as the template and it stays in the quilt. A glue pen and some steel rods with different points on each end are used to fold the fabric over the template. There is no iron involved. There are two rods and one point is like a little fork, another is bevelled, and the other two are different sized points. The rods are a steep $40 so I am still using my awl and a curved pair of small scissors to fold the edges over. I ended up ordering this brand of water soluble applique paper because Amazon carried it and I could have it in my hands in two days with Prime! No judging, please. LOL!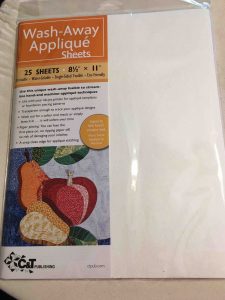
I didn’t order a glue pen either because I have a glue stick. Hindsight is 20/20 and I should have ordered a glue pen. The stick is ok but it’s messy and frays the fabric edge a bit. Next time I’m on Amazon, I’ll order one. 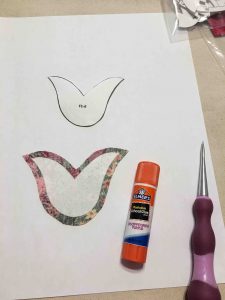
This method is so much better than the others I’ve tried. I’m looking forward to the project now and I think I’ve got my ducks in a row. I love how crisp the applique edges are and that the applique paper goes right through the ink jet printer. No tracing! 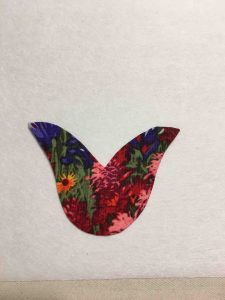
How do you applique? What is your favorite method?

One response to “Applique: Finding A Method”
This is fun to watch!!!
It is hard to remember, but I try to do things the easiest way that makes the prettiest result. I prefer ironed, turned under and stitched by hand but I keep my design flexible so that it is fun to do. When in a real hurry, I use a fuse technique and a machine appliqué stitch around.