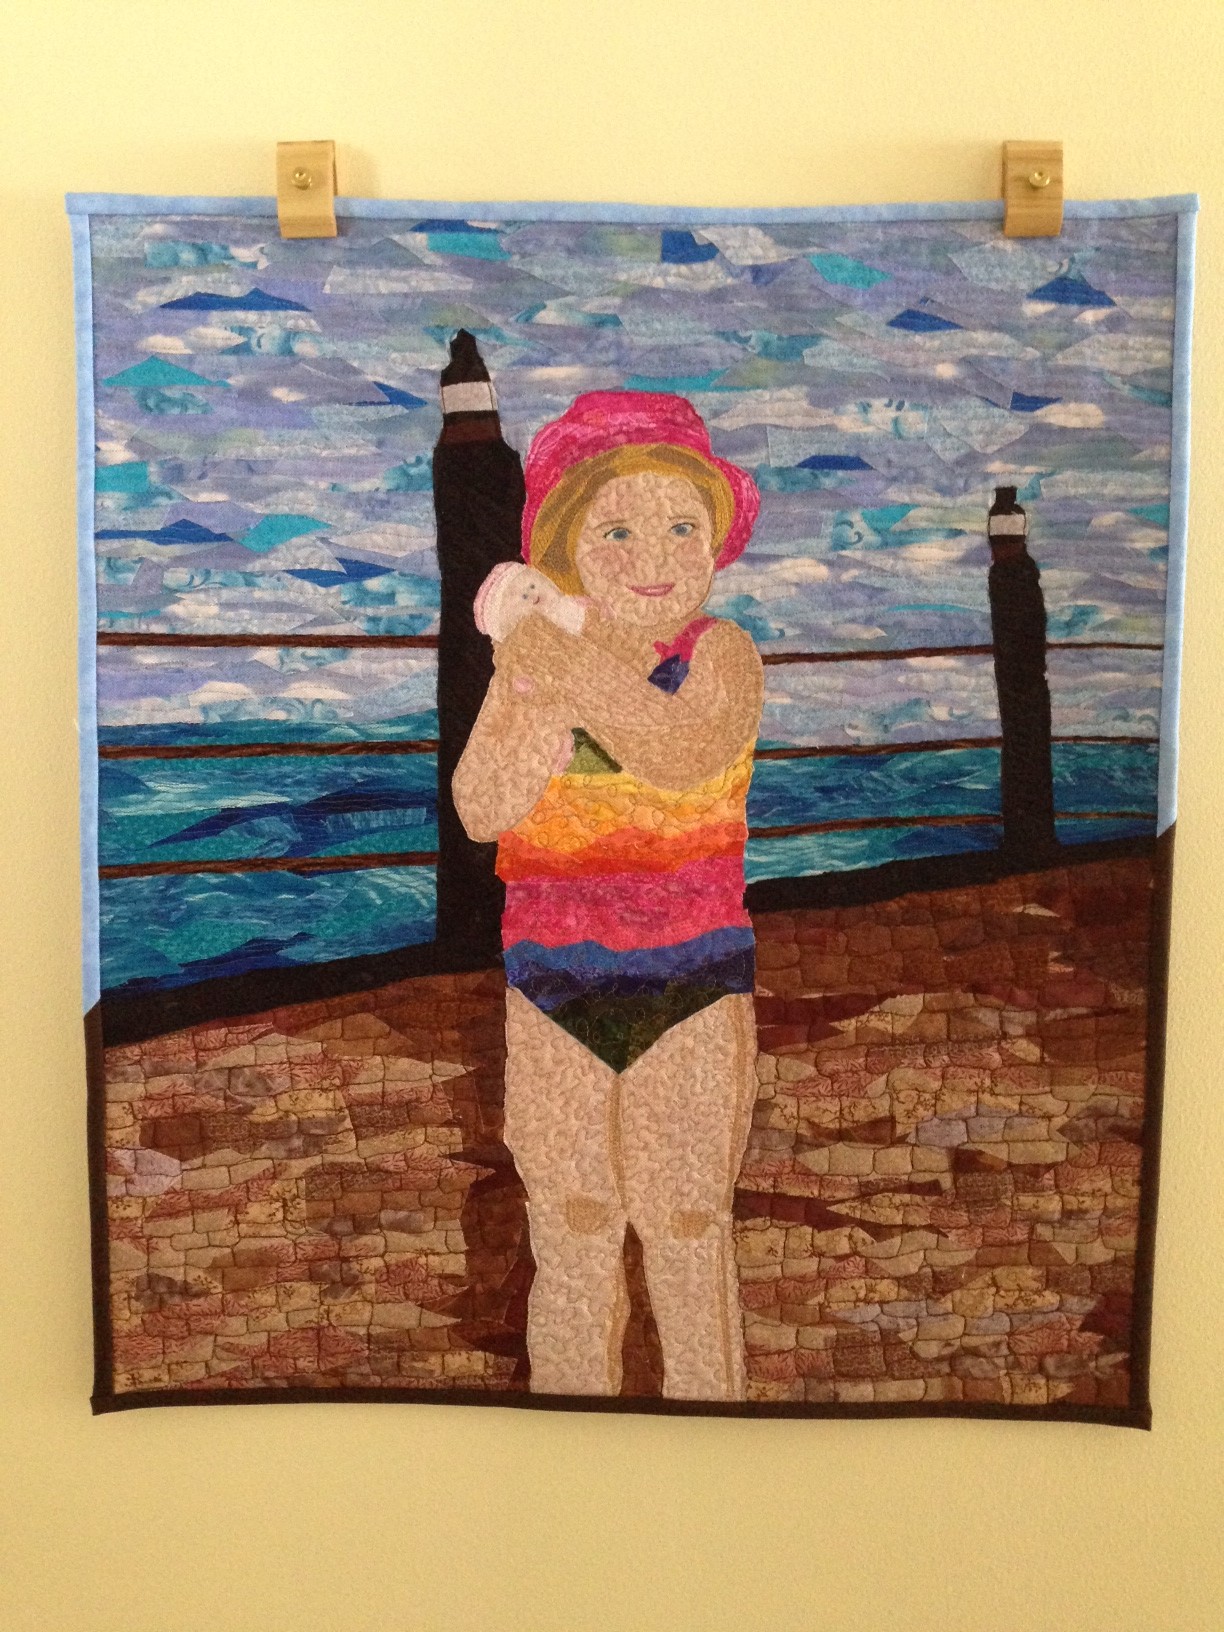
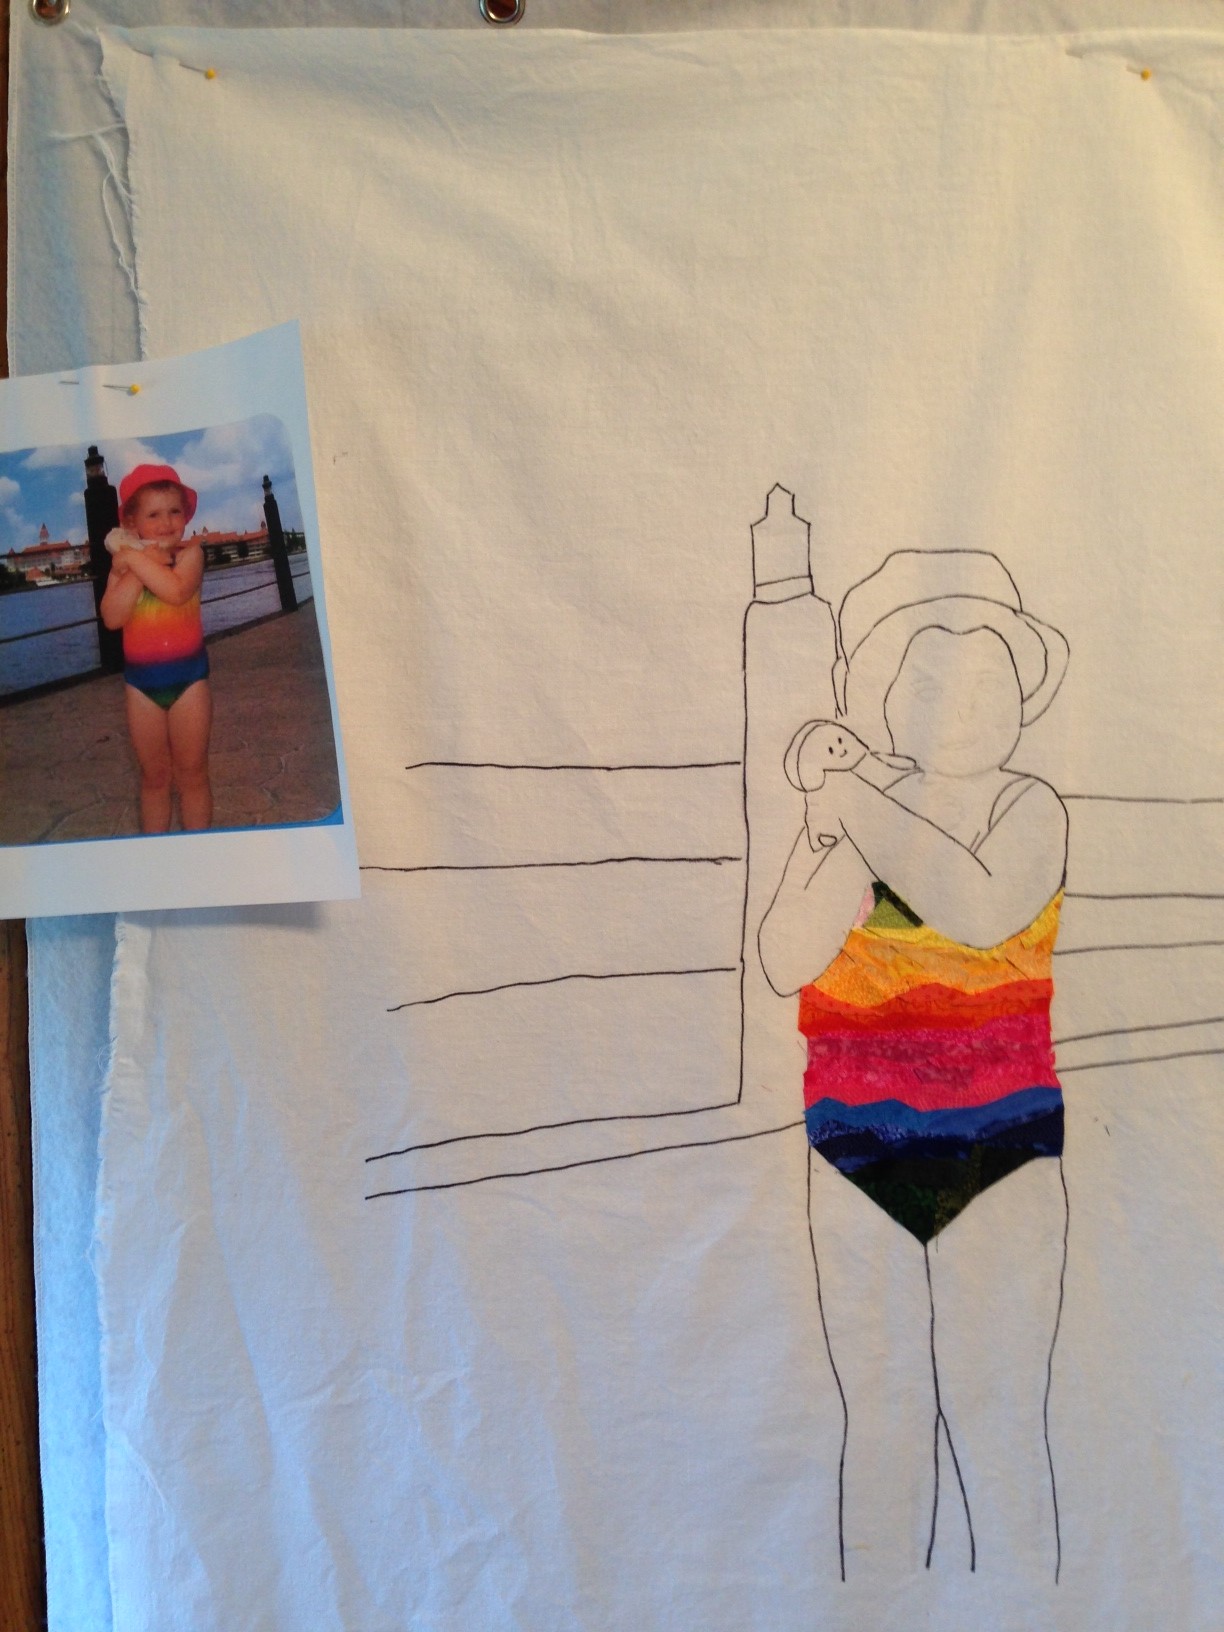
The Lindsey Project was started last year after I read about Susan Carlson’s method of painting a quilt not with paint but with fabric. It seemed like a fun way to explore a new technique and a great way to capture one of my favorite Lindsey moments when she was young and we were in Disney World. The technique was based on taking a photo, transferring the basic outlines to muslin and then using tiny pieces of fabric glued in place to make the project come alive. After the gluing came the thread sketching and then…ta da here she is!
You might remember it started like this…
I finished sewing the hanging sleeve on this morning and I placed it in the hallway for a little photo shoot.
I had concerns about the face not looking exactly like Lindsey’s face but after working with some thread and paint, I got it close enough to be happy with it. Working on a very small face is difficult especially if you are not trained in art.
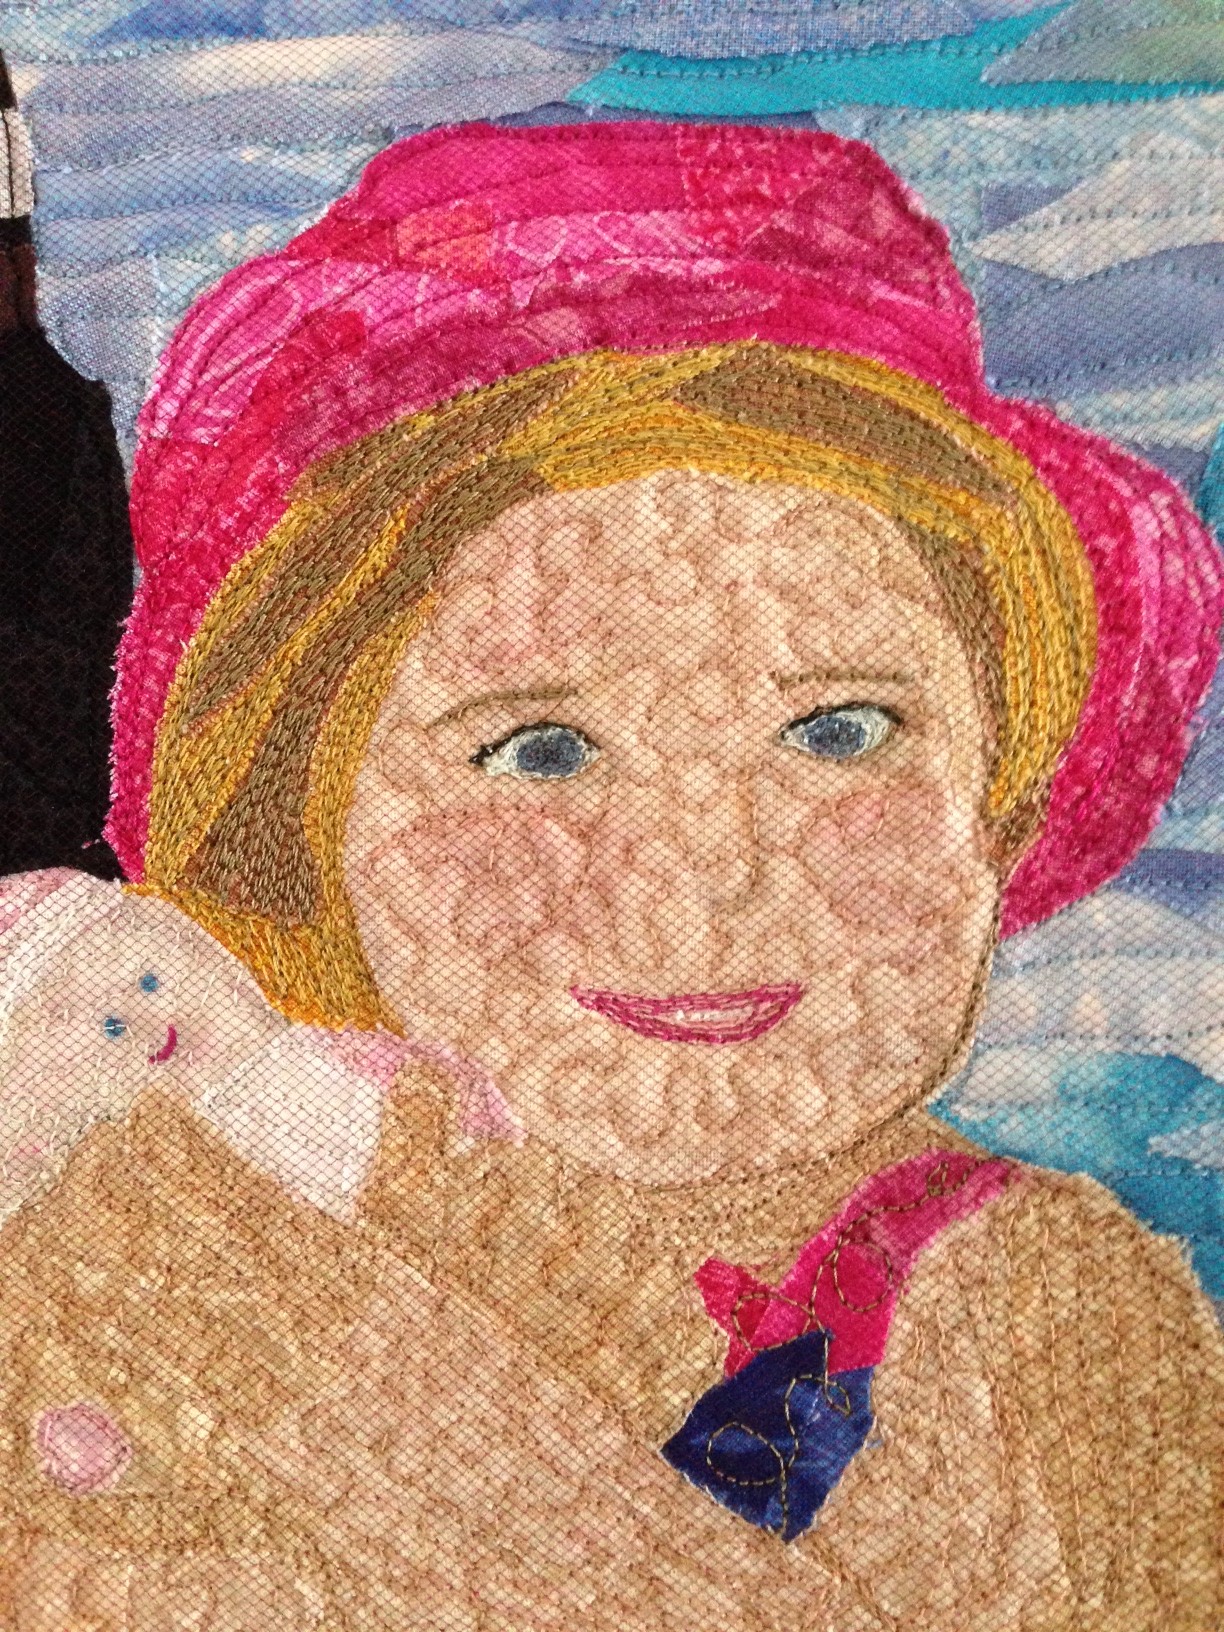
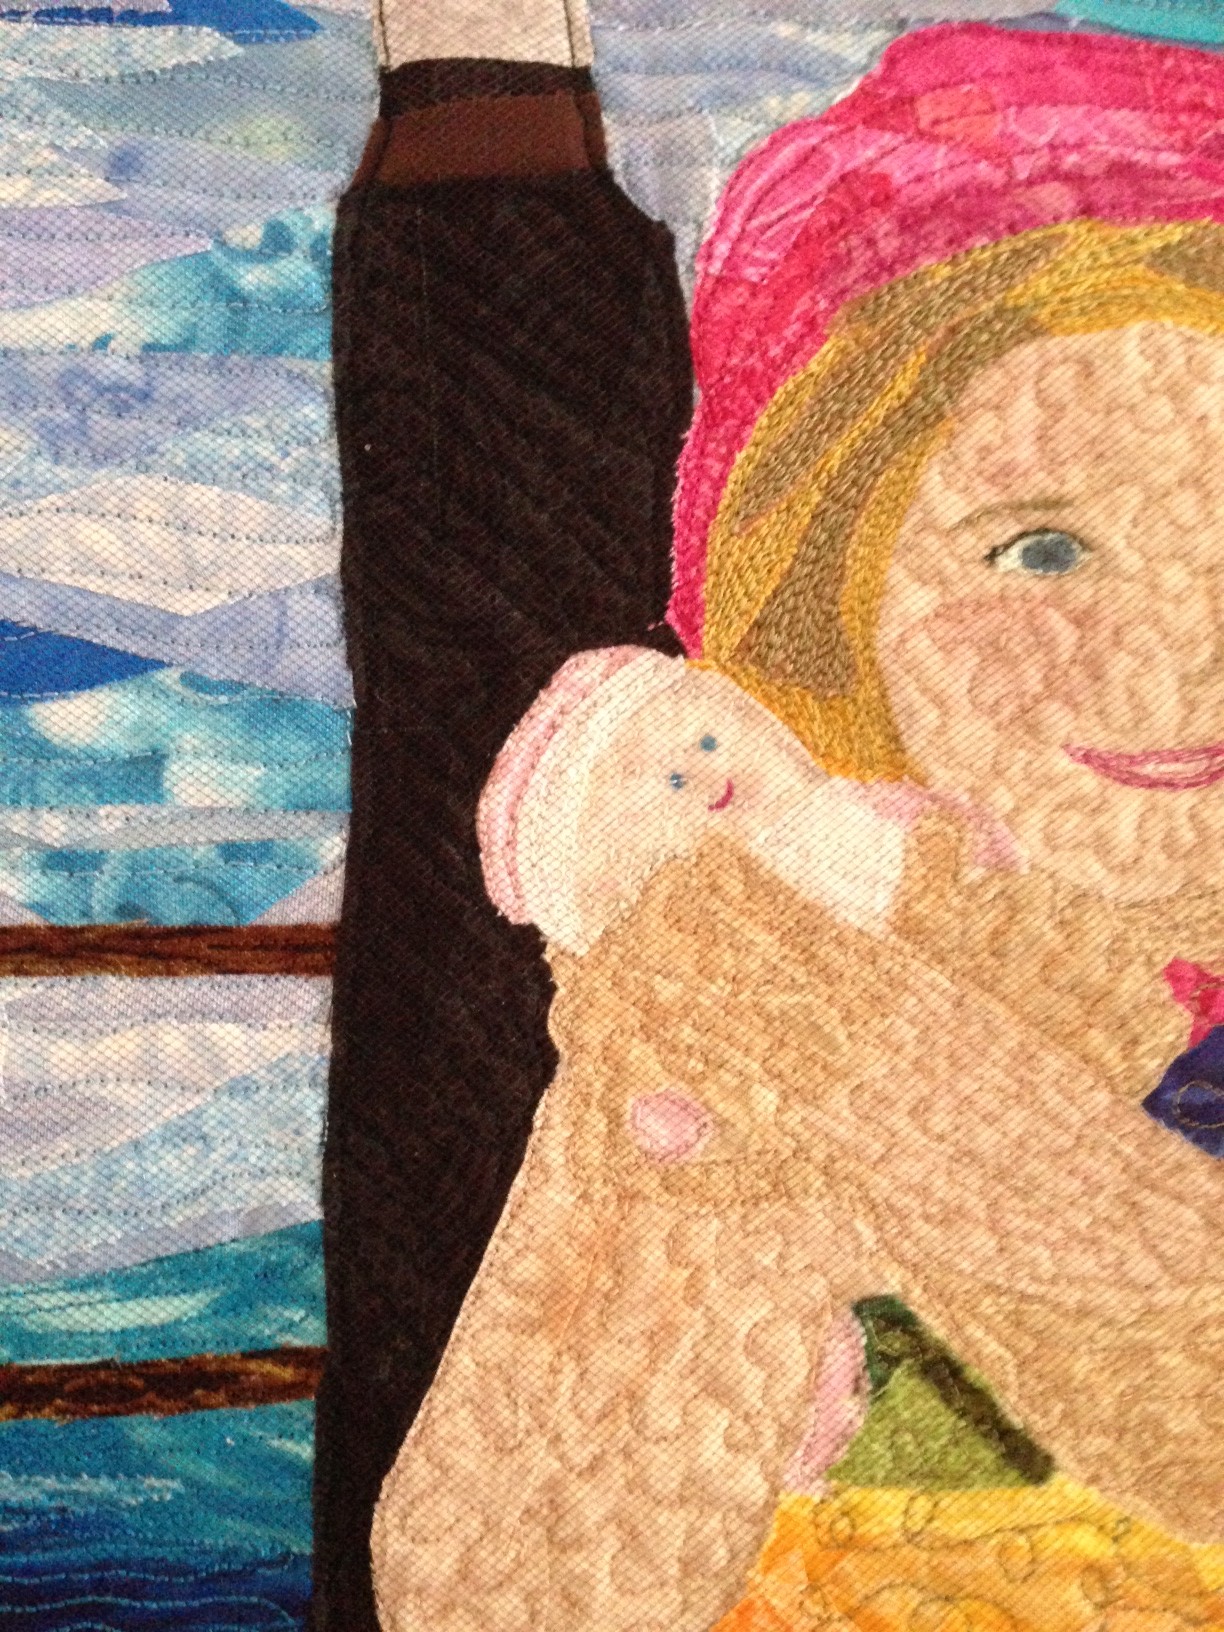
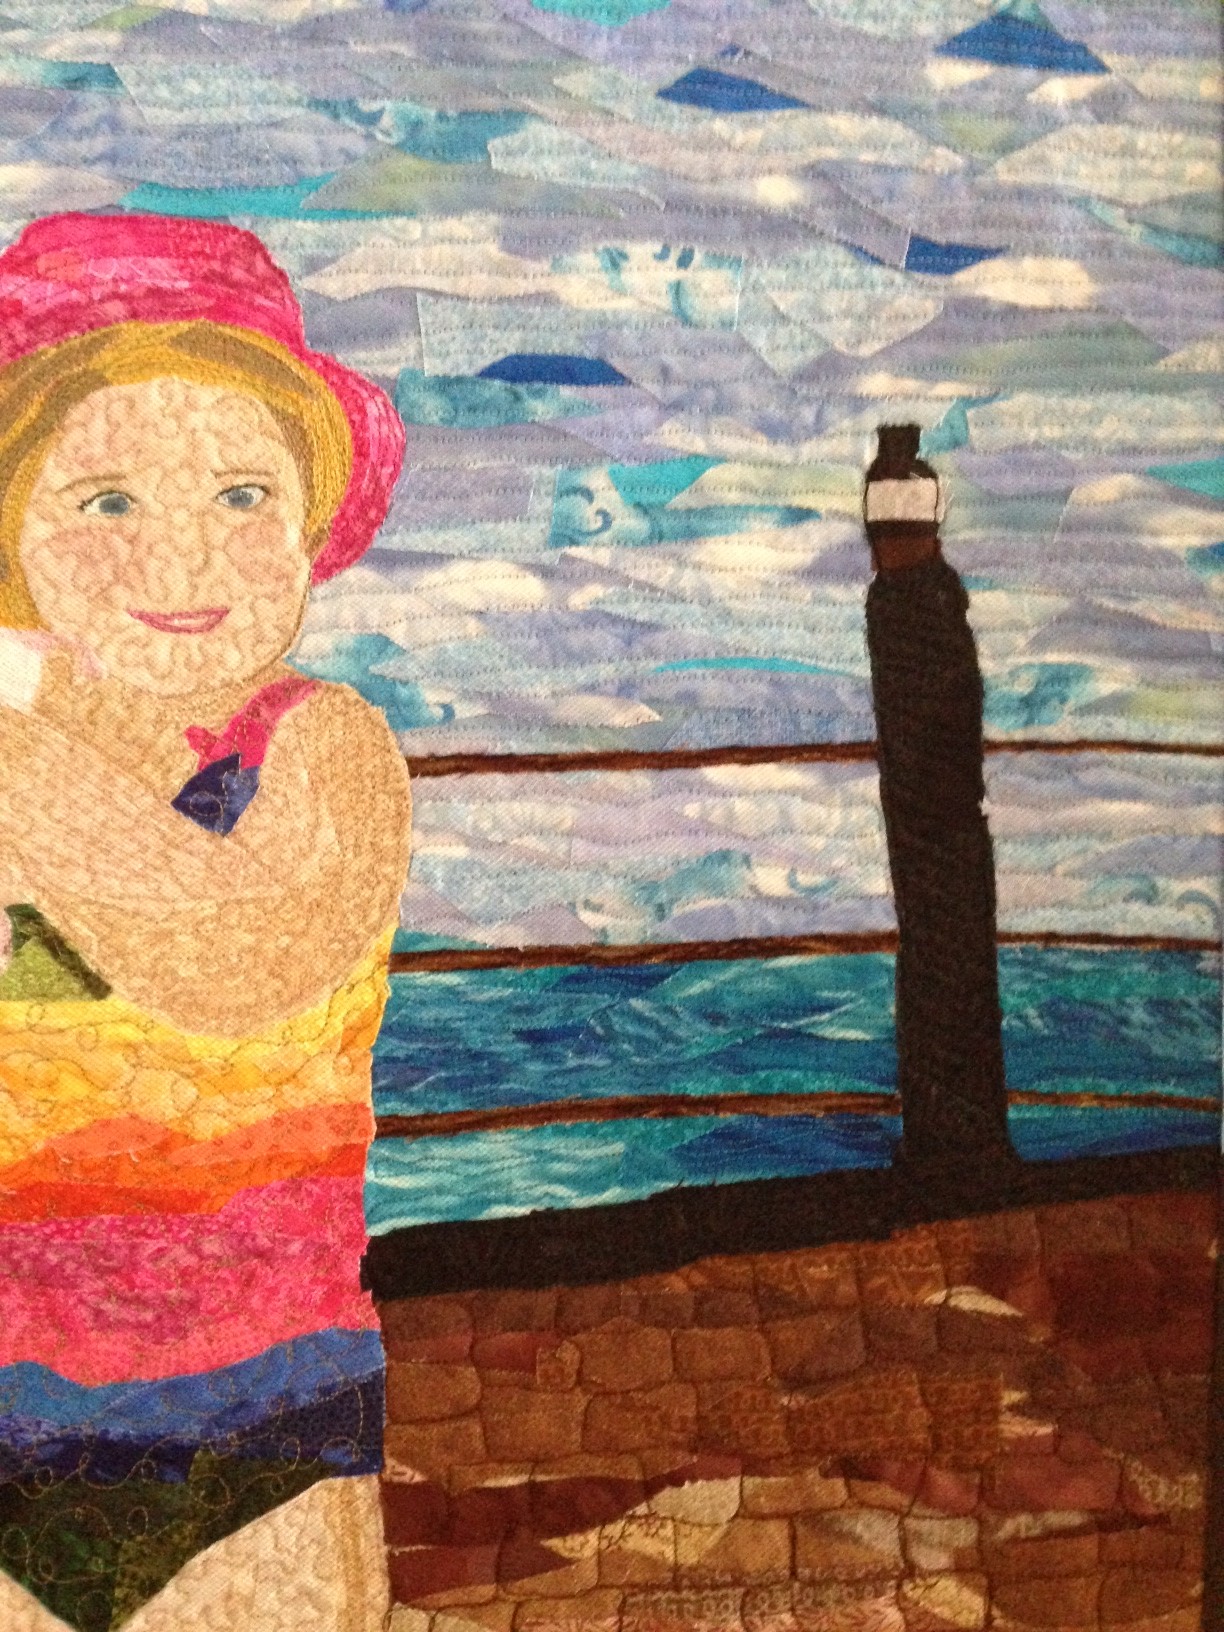
As you can see in some of the detail photos, a layer of cranberry tulle was placed over the entire piece before the quilting to keep the tiny fabric pieces from falling off. They were glued but this project was done over a number of months and some pieces had just a very small amount of glue on them. The tulle made it much easier to glide around under the free motion foot without snagging the needle on unruly pieces.
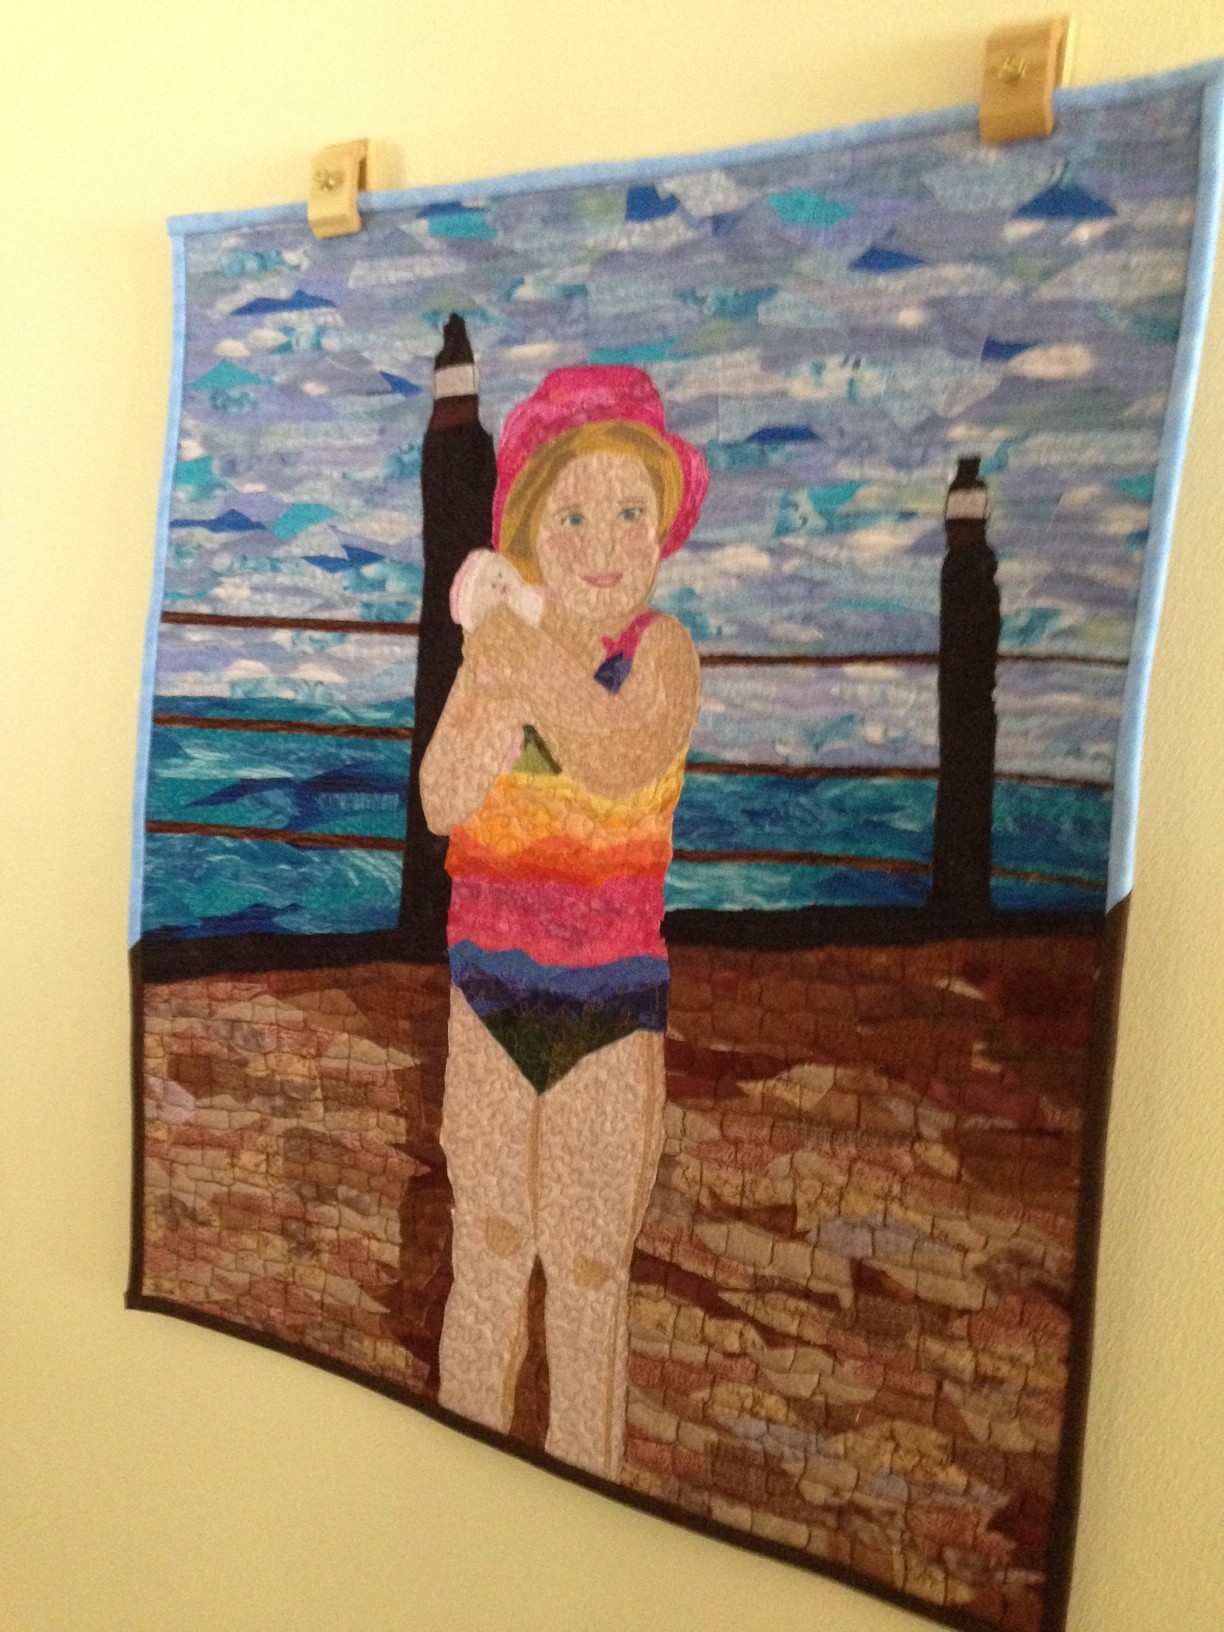
This piece will be entered in my guild’s annual show at the end of May. I think the Amanda quilt will also be entered.
So would I do this method again? Absolutely with one caveat. I would try it with a photo or drawing of a nonhuman. In Susan’s book she uses drawings of fish and of the sun and moon. I think it’s a fun and creative method of making an art quilt. The quilt has a water color like quality and it’s very pleasing to the eye.
I do have another technique I’d like to try with a human photo and that is the one that Twilter, Carol Woole, used on her art quilt of her dad. This is a technique shown on Sewing With Nancy by Tammy Bowser. It will require a software install that you can download for free for one week. After the week, you need to purchase it for around $100. I’ll think on which photo I’d like to use and then I’ll do the free download and give it a try.
Do you have a finish to share this week with us? We’d love to hear about it.
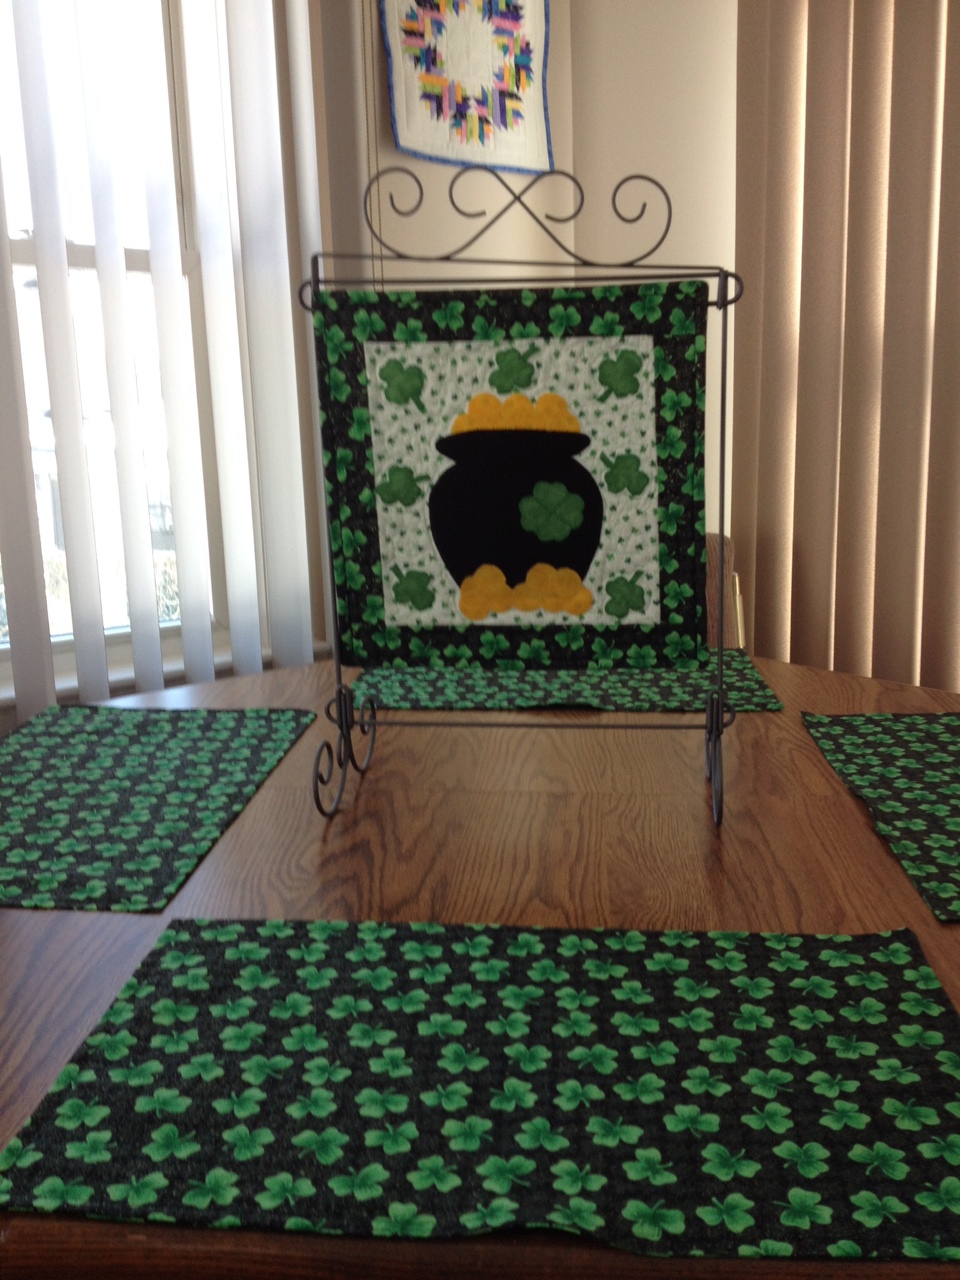
Are you looking for a quick St. Patty’s Day project? Try the Lucky mini quilt…
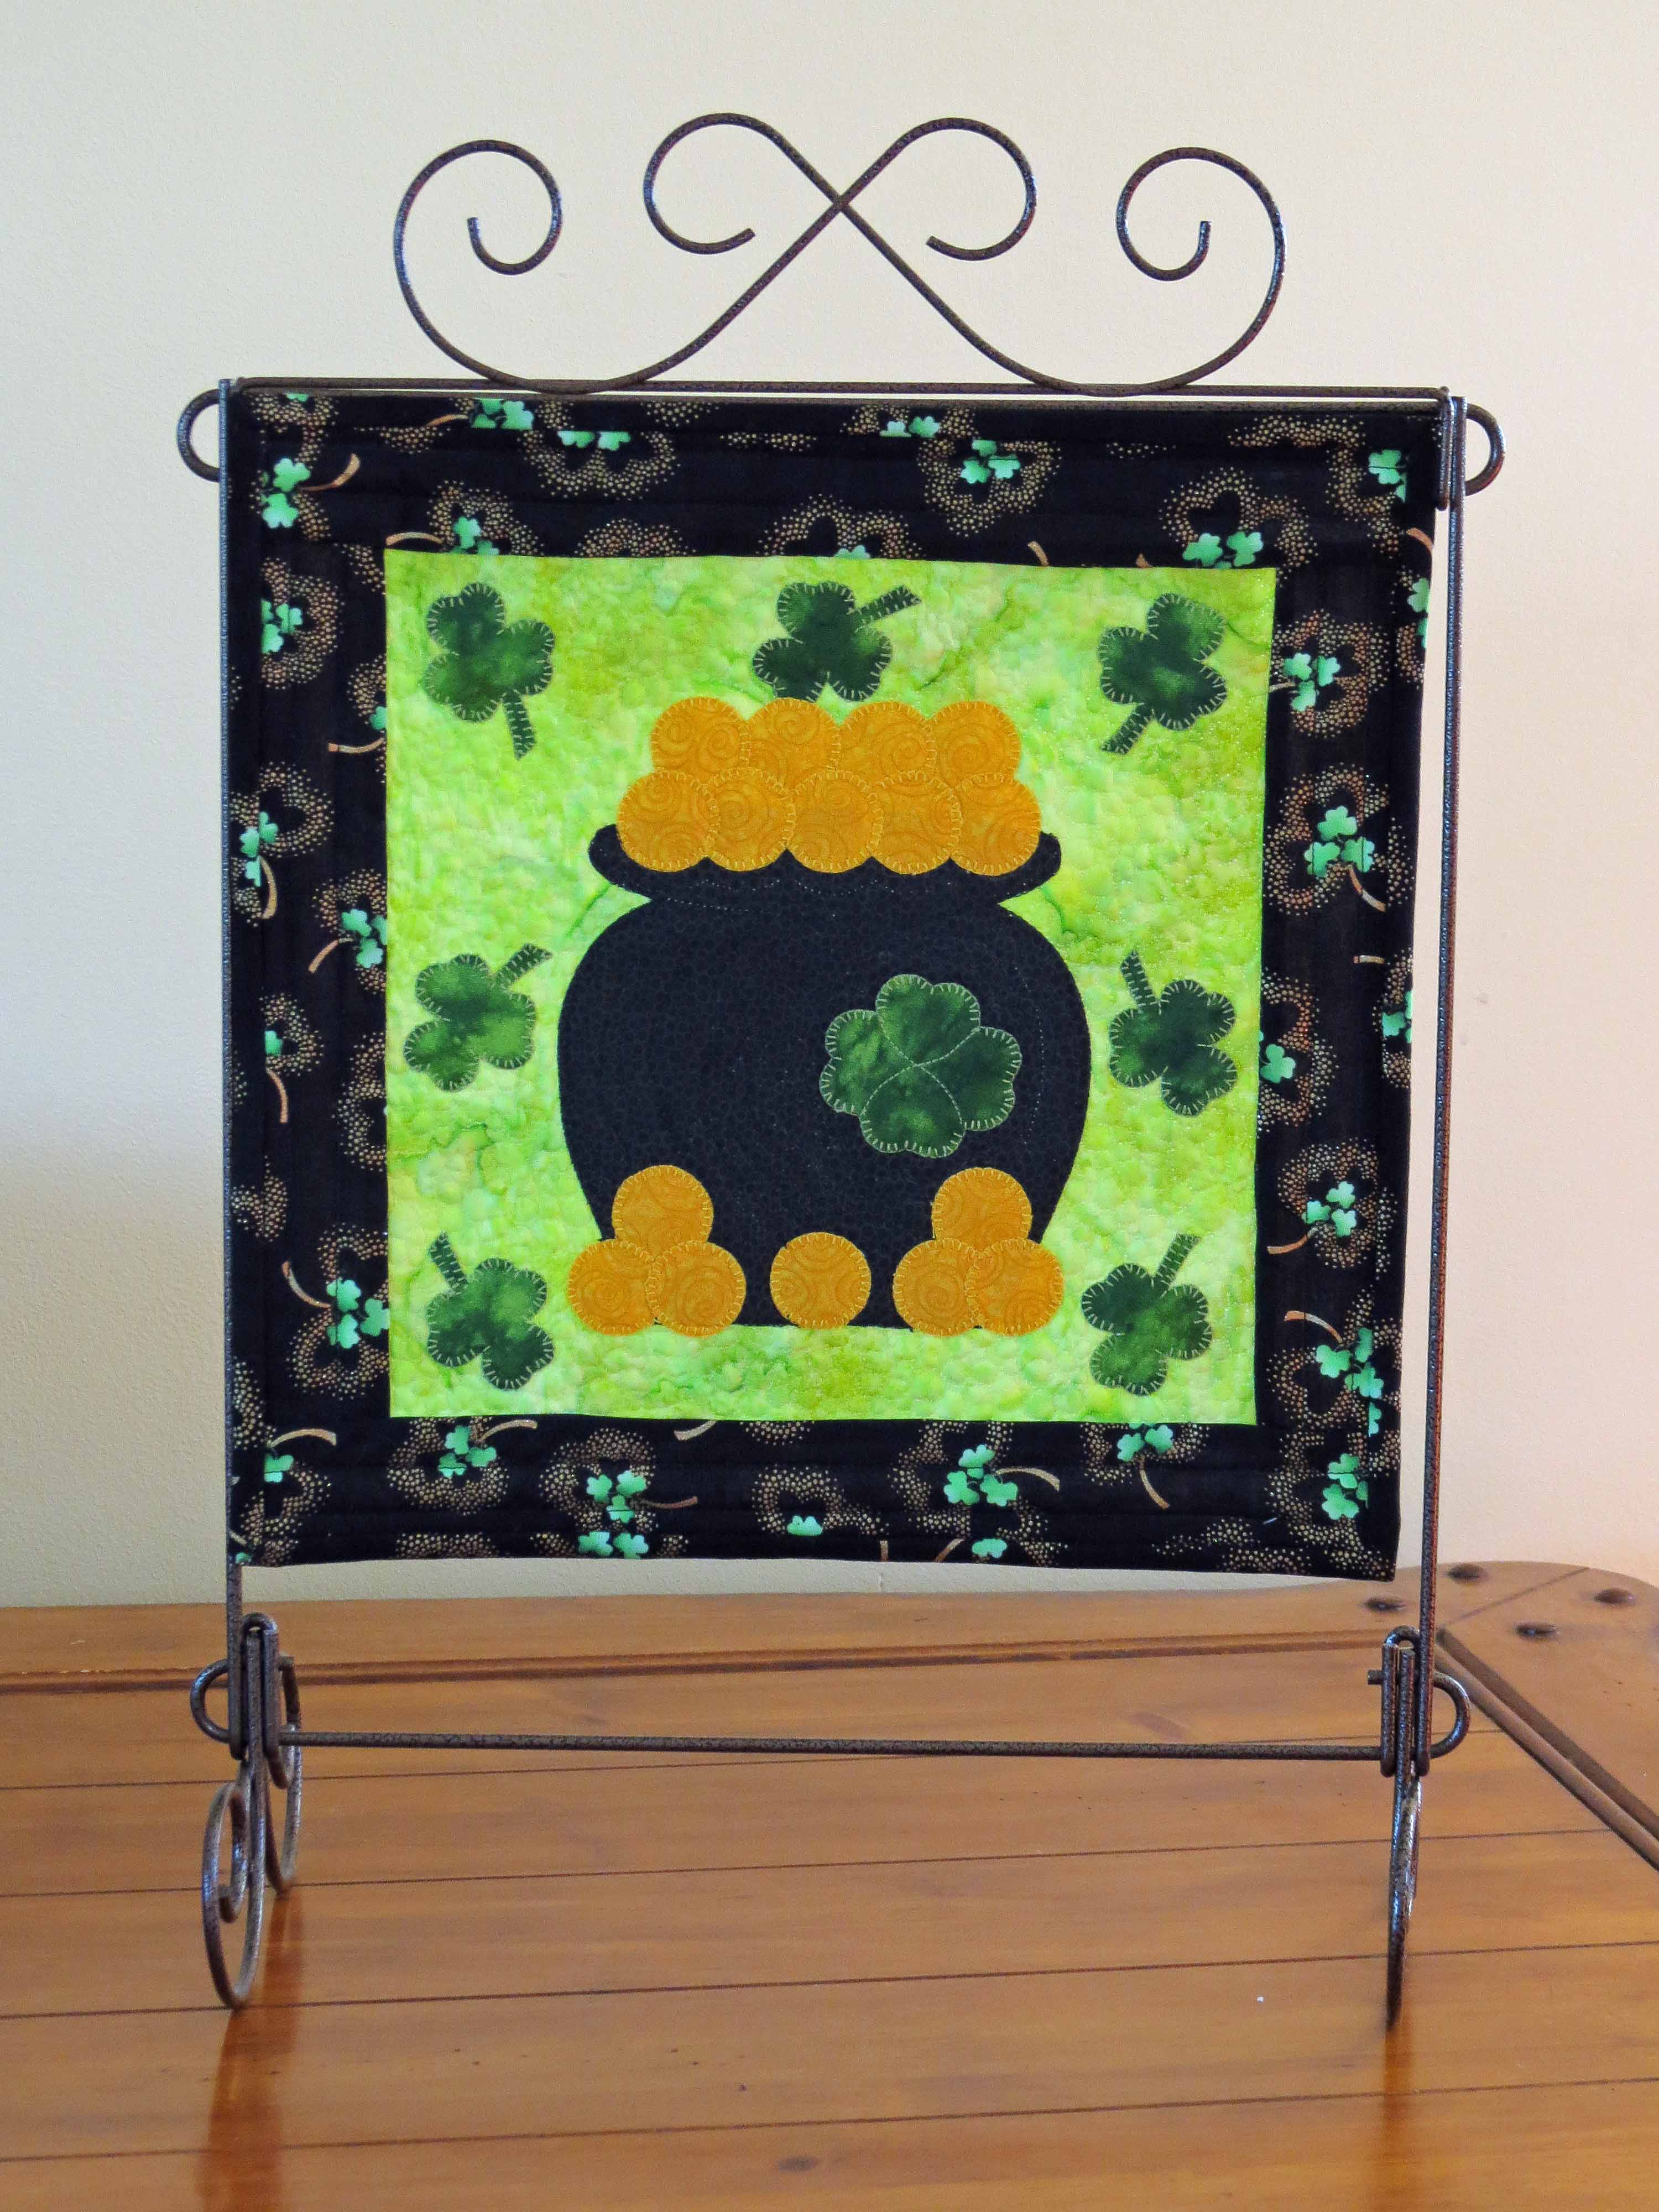
Here it is shown with matching place-mats. Pattern is for mini quilt only, place-mats can be made with your favorite pattern or tutorial.

5 responses to “And She’s Done! A Finish.”
This is absolutely fantastic, Sandi! Well worth the work put into it! You captured the feeling of the original photo so well, and it’s definitely a painterly style. I love this. Great, great job!
I am so excited to see this finished and know your guild will love it! I cannot wait to see what you do with Tammy Bowser’s technique, I know it will be incredible, too!
Wow, your Lindsey quilt has turned out so good! I really like this method and might give it a try some day…
I agree with Sandy, this came out fantastic! While you were showing the quilt in progress somehow I thought it was a lot bigger. Now that it’s finished and on the wall I can see it’s a small-ish quilt. I think you did a beautiful job, and it totally gives back the feeling of the photo. The tulle was a great idea! I would be very nervous drawing ees after gluing all that fabric down! 🙂 I think it’s very cool how you did the brown binding where the wall is, and how exactly it’s matching the colors where the dividing is.
What a wonderful quilt and memory and heirloom for you to pass down.